Using MFA with AWS CLI
Table of Contents
This post will explain what my workflow looks like when using the command line interface (CLI) for Amazon Web Services (AWS) when multi-factor authentication (MFA) is required.
Since it took me a little while to figure out how to get it working in the first place, and get a comfortable workflow in the second place, I decided to write it down here for future reference.
Context
First a bit of context.
One of the AWS best practices is to enable multi-factor authentication (MFA) for privileged users. You can even create a policy to require MFA. This means that users affected by the policy will have to enter their MFA code to log in via the web console, but also if they want to access the AWS APIs from the command line (e.g. in a Python script or using the AWS CLI).
Without MFA, you can configure your credentials in ~/.aws/credentials and that
file might look like this:
[default]
aws_access_key_id = AKIAIFFJM737PF5LH4VA
aws_secret_access_key = +gGgW9ElnjG73//uJxziR8dvgQzs++SFbR4at1Q9
(Don’t worry, the credentials have already been revoked.)
Assuming you have installed the AWS CLI, you can now interact with the AWS API like this:
$ aws s3 ls example.user.bucket
2019-02-19 20:23:44 3023 Vagrantfile
2019-02-19 20:23:42 372 config.yml
2019-02-19 20:23:44 206115 screenshot-1.png
But when the use of MFA is enforced, you’ll see this:
$ aws s3 ls example.user.bucket

An error occurred (AccessDenied) when calling the ListObjects operation: Access Denied
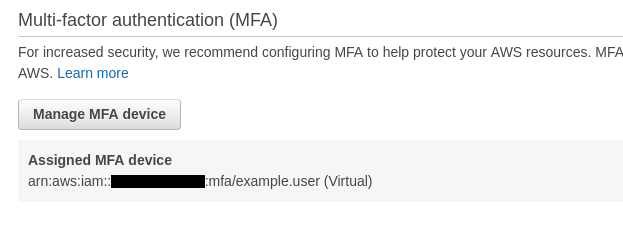
Assign an MFA device
Before we can continue, you’ll have to configure an MFA device. See the official documentation on enabling a Virtual Multi-factor Authentication (MFA) Device for instructions.
Make note of the assigned device, we’ll need it in a moment.
Manual authentication
To be able to use the CLI, you’ll have to request a so called “session token”:
$ aws sts get-session-token \
    --serial-number arn:aws:iam::xxxxxxxxxxxx:mfa/example.user \
    --token-code 287632
{
    "Credentials": {
        "AccessKeyId": "ASIARYSXPEDHOE73FL3V",
        "SecretAccessKey": "S1rS...F8KL",
        "SessionToken": "FQoG...seMF",
        "Expiration": "2019-02-20T07:36:27Z"
    }
}
Note the 6 digit code at the end of the command, this is the code generate by your MFA device (probably Google Authenticator or a similar app).
You can use these credentials in several ways:
-
Expose them via environment variables:
$ export AWS_ACCESS_KEY_ID=ASIARYSXPEDHOE73FL3V $ export AWS_SECRET_ACCESS_KEY=S1rS...F8KL $ export AWS_SESSION_TOKEN=FQoG...1seMF -
Put them in the credentials file (
~/.aws/credentials) as a new profile:[default] aws_access_key_id = AKIAIFFJM737PF5LH4VA aws_secret_access_key = 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 [session] aws_access_key_id=ASIARYSXPEDHOE73FL3V aws_secret_access_key=S1rS...F8KL aws_session_token=FQoG...1seMFNote that with this solution, you’ll have to specify the new profile when using the CLI, e.g. “
aws s3 ls example.user.bucket --profile session”
Since the token is only valid for 12 hours in my case, the manual workflow means you would have to do the copy/paste routine at least once per (work)day. Since I don’t like repetitive tasks and this is an excellent task to (at least partially) automate, let’s make the computer do the repetitive work for us.
Assisted management of session tokens
Obviously, I’m not the first one to want this, so I use a tool that already
exists: aws-mfa (PyPI,
GitHub).
There are alternatives that do, more or less, the same thing. What I liked about this tool:
- MIT license
- They use the boto3 library instead of starting a subprocess, running AWS CLI and parsing the JSON output.
As described in the documentation of the tool, you’ll have to modify your
credentials file (again: ~/.aws/credentials) a little bit:
[default-long-term]
aws_access_key_id = AKIAIFFJM737PF5LH4VA
aws_secret_access_key = +gGgW9ElnjG73//uJxziR8dvgQzs++SFbR4at1Q9
aws_mfa_device = arn:aws:iam::xxxxxxxxxxxx:mfa/example.user
Note that the profile name has changed and that the “aws_mfs_device” line has
been added.
With this configuration in place, you can request an session token:
$ aws-mfa
INFO - Validating credentials for profile: default
INFO - Short term credentials section default is missing, obtaining new credentials.
Enter AWS MFA code for device [arn:aws:iam::xxxxxxxxxxxx:mfa/example.user] (renewing for 43200 seconds): 466139
INFO - Fetching Credentials - Profile: default, Duration: 43200
INFO - Success! Your credentials will expire in 43200 seconds at: 2019-02-20 08:03:25+00:00
If you check your credentials file again, you’ll see that a “default” profile
has been added.
[default]
assumed_role = False
aws_access_key_id = ASIARYSXPEDHNH5EOH3I
aws_secret_access_key = fcD3...+FL3A
aws_session_token = FQoG...seMF
aws_security_token = FQo...seMF
expiration = 2019-02-20 08:03:25

[default-long-term]
aws_access_key_id = AKIAIFFJM737PF5LH4VA
aws_secret_access_key = +gGgW9ElnjG73//uJxziR8dvgQzs++SFbR4at1Q9
aws_mfa_device = arn:aws:iam::xxxxxxxxxxxx:mfa/example.user
Your original credentials in the “default-long-term” section are unchanged,
but the new “default” profile has all the short lived credentials.
As you can see, the new profile has an “aws_session_token” and an
“aws_security_token” entry with the same token. Apparently this is to
support both boto and boto3
Once again the AWS CLI is working again:
$ aws s3 ls example.user.bucket
2019-02-19 20:23:44 3023 Vagrantfile
2019-02-19 20:23:42 372 config.yml
2019-02-19 20:23:44 206115 screenshot-1.png
The biggest difference with the manual workflow is that this takes a whole lot less typing and is much less error prone.